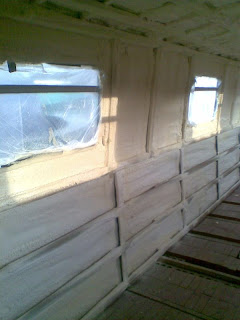
Spent sunday covering all the battens with Parcel tape, so that they would be easier to clean up after the spray foaming. I also covered where the rear hatch is going with a tarpaulin to try and keep some of the weather out.
When I tried cutting the holes in the shell for the water filler, I found all the teeth snapped of the cheap and nasty B&Q hole saw. Went to Screwfix & got a decent couple of holesaw blades and they are just the job.
The weather is really taking the *!**. The Sun came out, so I removed the windows from one side of the boat. Got the sander ready and - it started raining. By the time I had put the windows back in the sun came out again.
The engine bay had dried out reasonably well, so I managed to get a coat of Vactan on the areas that had started to rust. Hopefully if the tarp can keep the weather out, I can get the engine bay painted, then get the engine in soon, and I will have power and light.
The spray foaming was done during the week, so I could start cleaning up inside. What a huge
  difference, the inside seems so much bigger and lighter now the spray foam is done. Cleaned up one side of the boat before it started getting dark. Now the clocks have gone back I have to finish earlier.
When I tried cutting the holes in the shell for the water filler, I found all the teeth snapped of the cheap and nasty B&Q hole saw. Went to Screwfix & got a decent couple of holesaw blades and they are just the job.
The weather is really taking the *!**. The Sun came out, so I removed the windows from one side of the boat. Got the sander ready and - it started raining. By the time I had put the windows back in the sun came out again.
The engine bay had dried out reasonably well, so I managed to get a coat of Vactan on the areas that had started to rust. Hopefully if the tarp can keep the weather out, I can get the engine bay painted, then get the engine in soon, and I will have power and light.

The spray foaming was
 done during the week, so I could start cleaning up inside. What a huge
  difference, the inside seems so much bigger and lighter now the spray foam is done. Cleaned up one side of the boat before it started getting dark. Now the clocks have gone back I have to finish earlier.


